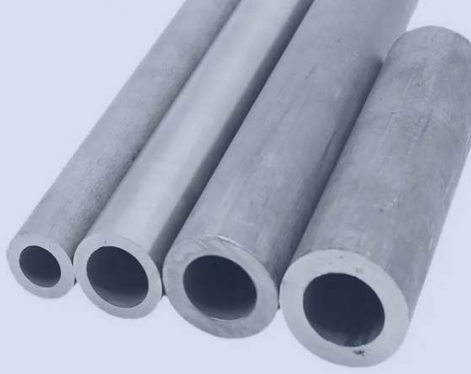
Brinell hardness and Rockwell hardness are both standards for testing the hardness of steel pipes. The difference lies in the different measurement methods.
Brinell hardness
Among the standards for seamless pipes and welded steel tubes, Brinell hardness is the most widely used, and the indentation diameter is often used to express the hardness of the material, which is intuitive and convenient. But it is not suitable for steel pipes of harder or thinner steel.
Test Methods
Use a steel ball or hard alloy ball of a certain diameter to press into the surface of the sample with the specified test force (F), remove the test force after the specified holding time, and measure the indentation diameter (L) on the sample surface. The Brinell hardness value is the quotient obtained by dividing the test force by the spherical surface area of the indentation. Expressed in HBS (steel ball), the unit is N/mm2 (MPa).
Its calculation formula is: F/π(d/2)2
In the formula: F--the test force pressed into the surface of the metal sample, N;
D--The diameter of the steel ball used in the test, mm;
d - the average diameter of the indentation, mm.
Determination of Brinell hardness is more accurate and reliable, but generally HBS is only suitable for pipes below 450N/mm2 (MPa), not for harder steel or thinner steel pipes. Among steel pipe standards, Brinell hardness is the most widely used, and the indentation diameter d is often used to express the hardness of the material, which is intuitive and convenient. The Brinell hardness test can also be used for non-ferrous metals and mild steels, and small-diameter ball indenters can be used to measure small-sized and thinner materials. The Brinell hardness tester is mostly used for testing raw materials and semi-finished products. Due to the large indentation, it is generally not used for finished product testing.

Rockwell hardness
The Rockwell hardness test of steel pipes is the same as the Brinell hardness test, which is an indentation test method. The difference is that it measures the depth of the indentation.
The Rockwell hardness test of steel pipes is a widely used method at present, among which HRC is second only to Brinell hardness HB in steel pipe standards. Rockwell hardness is suitable for measuring metal materials ranging from extremely soft to extremely hard. It makes up for the shortcomings of the Brinell method and is simpler than the Brinell method. The hardness value can be read directly from the dial of the hardness machine. However, due to its small indentation, the hardness value is not as accurate as the Brinell method.
The Rockwell hardness test uses three test forces and three indenters. There are 9 combinations of them, corresponding to the 9 scales of Rockwell hardness. The application of these 9 rulers covers almost all commonly used metal materials. The most commonly used scales are HRC, HRB and HRF, among which the HRC scale is used to test quenched steel, tempered steel, quenched and tempered steel and some stainless steels. This is the most widely used hardness test method. HRB scale is used to test various annealed steels, normalized steels, mild steels, some stainless steels and harder copper alloys. The HRF scale is used to test pure copper, softer copper alloys and duralumin alloys. Although the HRA scale can also be used for most ferrous metals, its practical application is generally limited to testing cemented carbide and thin hard steel strip tubes.
The superficial Rockwell hardness test adopts three test forces and two kinds of indenters, which have 6 combinations, corresponding to 6 scales of superficial Rockwell hardness. The superficial Rockwell hardness test is a supplement to the Rockwell hardness test. When using the Rockwell hardness test, when the material is thin, the sample is small, the surface hardening layer is shallow or the surface coating is tested, the surface Rockwell hardness test should be used instead. At this time, using the same indenter as the Rockwell hardness test, and using a test force that is only a fraction of the Rockwell hardness test, effective hardness test results can be obtained on the above-mentioned samples. The N scale of the surface Rockwell hardness is suitable for materials tested by HRC, HRA and HRD similar to Rockwell hardness; the T scale is suitable for materials tested by HRB, HRF and HRG similar to Rockwell hardness.
The use range of the HRC scale is 20~70HRC. When the hardness value is less than 20HRC, because the conical part of the indenter is pressed too much, the sensitivity will decrease. At this time, the HRB scale should be used instead. Although the upper limit value of the HRC scale is 70HRC, when the hardness of the sample is greater than 67HRC, the pressure on the tip of the indenter is too large, the diamond is easily damaged, and the life of the indenter will be greatly shortened. Therefore, the HRA scale should generally be used instead.
The use range of the HRA scale is 20-88HRA, and the following conversion relationship can be obtained from the American standard ASTM E140:
27HRA≈30HRB
60HRA≈100HRB≈20HRC
85.6HRA≈68HRC
Brinell hardness
Among the standards for seamless pipes and welded steel tubes, Brinell hardness is the most widely used, and the indentation diameter is often used to express the hardness of the material, which is intuitive and convenient. But it is not suitable for steel pipes of harder or thinner steel.
Test Methods
Use a steel ball or hard alloy ball of a certain diameter to press into the surface of the sample with the specified test force (F), remove the test force after the specified holding time, and measure the indentation diameter (L) on the sample surface. The Brinell hardness value is the quotient obtained by dividing the test force by the spherical surface area of the indentation. Expressed in HBS (steel ball), the unit is N/mm2 (MPa).
Its calculation formula is: F/π(d/2)2
In the formula: F--the test force pressed into the surface of the metal sample, N;
D--The diameter of the steel ball used in the test, mm;
d - the average diameter of the indentation, mm.
Determination of Brinell hardness is more accurate and reliable, but generally HBS is only suitable for pipes below 450N/mm2 (MPa), not for harder steel or thinner steel pipes. Among steel pipe standards, Brinell hardness is the most widely used, and the indentation diameter d is often used to express the hardness of the material, which is intuitive and convenient. The Brinell hardness test can also be used for non-ferrous metals and mild steels, and small-diameter ball indenters can be used to measure small-sized and thinner materials. The Brinell hardness tester is mostly used for testing raw materials and semi-finished products. Due to the large indentation, it is generally not used for finished product testing.

Rockwell hardness
The Rockwell hardness test of steel pipes is the same as the Brinell hardness test, which is an indentation test method. The difference is that it measures the depth of the indentation.
The Rockwell hardness test of steel pipes is a widely used method at present, among which HRC is second only to Brinell hardness HB in steel pipe standards. Rockwell hardness is suitable for measuring metal materials ranging from extremely soft to extremely hard. It makes up for the shortcomings of the Brinell method and is simpler than the Brinell method. The hardness value can be read directly from the dial of the hardness machine. However, due to its small indentation, the hardness value is not as accurate as the Brinell method.
The Rockwell hardness test uses three test forces and three indenters. There are 9 combinations of them, corresponding to the 9 scales of Rockwell hardness. The application of these 9 rulers covers almost all commonly used metal materials. The most commonly used scales are HRC, HRB and HRF, among which the HRC scale is used to test quenched steel, tempered steel, quenched and tempered steel and some stainless steels. This is the most widely used hardness test method. HRB scale is used to test various annealed steels, normalized steels, mild steels, some stainless steels and harder copper alloys. The HRF scale is used to test pure copper, softer copper alloys and duralumin alloys. Although the HRA scale can also be used for most ferrous metals, its practical application is generally limited to testing cemented carbide and thin hard steel strip tubes.
The superficial Rockwell hardness test adopts three test forces and two kinds of indenters, which have 6 combinations, corresponding to 6 scales of superficial Rockwell hardness. The superficial Rockwell hardness test is a supplement to the Rockwell hardness test. When using the Rockwell hardness test, when the material is thin, the sample is small, the surface hardening layer is shallow or the surface coating is tested, the surface Rockwell hardness test should be used instead. At this time, using the same indenter as the Rockwell hardness test, and using a test force that is only a fraction of the Rockwell hardness test, effective hardness test results can be obtained on the above-mentioned samples. The N scale of the surface Rockwell hardness is suitable for materials tested by HRC, HRA and HRD similar to Rockwell hardness; the T scale is suitable for materials tested by HRB, HRF and HRG similar to Rockwell hardness.
The use range of the HRC scale is 20~70HRC. When the hardness value is less than 20HRC, because the conical part of the indenter is pressed too much, the sensitivity will decrease. At this time, the HRB scale should be used instead. Although the upper limit value of the HRC scale is 70HRC, when the hardness of the sample is greater than 67HRC, the pressure on the tip of the indenter is too large, the diamond is easily damaged, and the life of the indenter will be greatly shortened. Therefore, the HRA scale should generally be used instead.
The use range of the HRA scale is 20-88HRA, and the following conversion relationship can be obtained from the American standard ASTM E140:
27HRA≈30HRB
60HRA≈100HRB≈20HRC
85.6HRA≈68HRC


