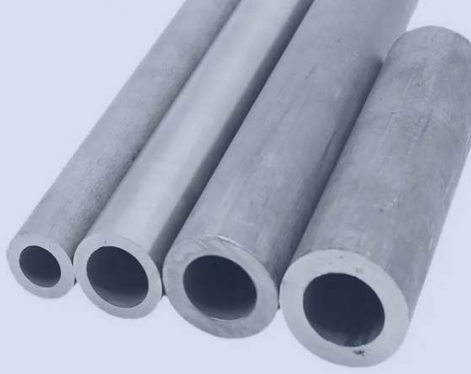
DIN 2391 standard specifies the seamless steel tubes used for Mechanical and Automobile.The main products of steel / steel grade: DIN2391-1(ST35, ST45, ST52).Its technical delivery conditions are as follows
1. Surface condition
The inner and outer surfaces of the steel pipe must be smooth, without surface defects such as ears, folds, and heavy skins, and the average roughness Ra≤μm. Appropriate methods can be used to clear relatively small surface defects, but care should be taken not to exceed the allowable deviation of the size.
2. Allowable deviation of diameter and wall thickness
For steel pipes delivered in BK and BKW, the allowable diameter deviation is subject to DIN2391 Pt1.However, for the steel pipes with the delivery status of BKS, GBK and NBK, the diameter deviation increases due to heating deformation, and the allowable increase is as follows:
1) S/D≥1/20 According to the value specified in the dimension table of DIN 2391 Pt1.
2) 1/40≤S/D<1/20 1.5 times the value specified in the DIN 2391 Pt1 dimension table.
3) S/D<1/40 is twice the value specified in the DIN2391 Pt1 dimension table.
4) The wall thickness deviation is ±10% of the nominal size.
3. Bending deviation
The curvature deviation is expressed by the deviation of a tension line or a ruler with a length of 1000mm and any two points parallel to the axis of the steel pipe.
1) D>15mm curvature deviation ≤0.25% of measured length
2) For steel pipes with yield point > 500MPa, the bending deviation is less than or equal to 0.3% of the measured length
3) For fixed-length steel pipes of less than 1000mm, the maximum deviation of the bending degree is 0.3% of the respective pipe lengths.
4) For steel pipes with D≤15mm, the measurement method should be negotiated. If there is a higher requirement for straightness, the C-grade quality should be used.
4. Length tolerance
Double ruler length: ±500mm
Fixed length: L≤500mm 0~+2mm
500mm 2000mm 5000mm L>7000mm by negotiation
5. Over-delivery and under-delivery
For steel pipes with precise length, less delivery is not allowed, and more delivery should meet the following requirements: order quantity (m) allowable deviation (%)
≤500+20
50 >2000+10
6. Ring sample flattening test
For annealed or normalized steel tubes with S < 15% D, the flattening test is carried out according to DIN EN 10233, and the pressure plate spacing is: H=(1+C)S/(C+S/D)
In the formula: S = wall thickness (mm)
D = outer diameter of steel pipe (mm);
C=constant
For St 30 and St 35, its C value is 0.09, and for St45 and St52, its C value is 0.07

7. Flaring test
For D≤150mm, S≤9mm, expand according to DINEN10234 to the following expansion rate.
8. Non-destructive testing
If there are special requirements for the dispersion of steel pipes, the following non-destructive testing methods can be considered:
1) Hole flow inspection, according to PRP02-74, mainly inspects horizontal positioning defects
2) Ultrasonic inspection, according to Steel-Iron-Test Standard Volume 1915, mainly inspects weaving orientation defects.
9. Logo
The steel pipe should be marked with a signboard and fixed on the pipe holder or the packing box. The marking contents are as follows:
1) Manufacturer's mark
2) Delivery technical conditions and quality grades
3) Steel grade
4) Delivery status (abbreviation)
5) Dimensions
6) Imprint of the inspector
10. Surface protection
Unless otherwise agreed, steel pipes shall be delivered with temporary corrosion protection
11. Packaging
The type of printing and packaging shall be stipulated in the agreement.
1. Surface condition
The inner and outer surfaces of the steel pipe must be smooth, without surface defects such as ears, folds, and heavy skins, and the average roughness Ra≤μm. Appropriate methods can be used to clear relatively small surface defects, but care should be taken not to exceed the allowable deviation of the size.
2. Allowable deviation of diameter and wall thickness
For steel pipes delivered in BK and BKW, the allowable diameter deviation is subject to DIN2391 Pt1.However, for the steel pipes with the delivery status of BKS, GBK and NBK, the diameter deviation increases due to heating deformation, and the allowable increase is as follows:
1) S/D≥1/20 According to the value specified in the dimension table of DIN 2391 Pt1.
2) 1/40≤S/D<1/20 1.5 times the value specified in the DIN 2391 Pt1 dimension table.
3) S/D<1/40 is twice the value specified in the DIN2391 Pt1 dimension table.
4) The wall thickness deviation is ±10% of the nominal size.
3. Bending deviation
The curvature deviation is expressed by the deviation of a tension line or a ruler with a length of 1000mm and any two points parallel to the axis of the steel pipe.
1) D>15mm curvature deviation ≤0.25% of measured length
2) For steel pipes with yield point > 500MPa, the bending deviation is less than or equal to 0.3% of the measured length
3) For fixed-length steel pipes of less than 1000mm, the maximum deviation of the bending degree is 0.3% of the respective pipe lengths.
4) For steel pipes with D≤15mm, the measurement method should be negotiated. If there is a higher requirement for straightness, the C-grade quality should be used.
4. Length tolerance
Double ruler length: ±500mm
Fixed length: L≤500mm 0~+2mm
500mm
5. Over-delivery and under-delivery
For steel pipes with precise length, less delivery is not allowed, and more delivery should meet the following requirements: order quantity (m) allowable deviation (%)
≤500+20
50
6. Ring sample flattening test
For annealed or normalized steel tubes with S < 15% D, the flattening test is carried out according to DIN EN 10233, and the pressure plate spacing is: H=(1+C)S/(C+S/D)
In the formula: S = wall thickness (mm)
D = outer diameter of steel pipe (mm);
C=constant
For St 30 and St 35, its C value is 0.09, and for St45 and St52, its C value is 0.07

7. Flaring test
For D≤150mm, S≤9mm, expand according to DINEN10234 to the following expansion rate.
8. Non-destructive testing
If there are special requirements for the dispersion of steel pipes, the following non-destructive testing methods can be considered:
1) Hole flow inspection, according to PRP02-74, mainly inspects horizontal positioning defects
2) Ultrasonic inspection, according to Steel-Iron-Test Standard Volume 1915, mainly inspects weaving orientation defects.
9. Logo
The steel pipe should be marked with a signboard and fixed on the pipe holder or the packing box. The marking contents are as follows:
1) Manufacturer's mark
2) Delivery technical conditions and quality grades
3) Steel grade
4) Delivery status (abbreviation)
5) Dimensions
6) Imprint of the inspector
10. Surface protection
Unless otherwise agreed, steel pipes shall be delivered with temporary corrosion protection
11. Packaging
The type of printing and packaging shall be stipulated in the agreement.


