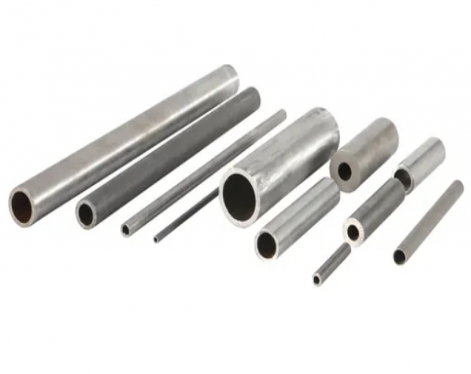
Seamless steel pipe(a53 grade b pipe) quality inspection is divided into the following aspects: chemical composition analysis; steel pipe geometric size and shape inspection; seamless pipe steel surface quality inspection; seamless pipe steel management performance inspection; seamless pipe steel pipe process performance inspection; none Metallographic analysis of seam pipe and steel pipe.
1. Chemical composition analysis: chemical analysis method, instrumental analysis method (infrared C—S instrument, direct reading spectrometer, zcP, etc.).
① Infrared C-S instrument: Analyze the C and S elements in ferroalloys, steel-making raw materials, and steel.
②Direct reading spectrometer: C, Si, Mn, P, S, Cr, Mo, Ni, Cn, Al, W, V, Ti, B, Nb, As, Sn, Sb, Pb, Bi in the bulk sample
③N-0 instrument: gas content analysis N, O
2. Steel pipe geometry and shape inspection:
① Inspection of seamless pipe wall thickness: micrometer, ultrasonic thickness gauge, no less than 8 points at both ends and record.
②Examination of the outer diameter and ovality of seamless pipes: calipers, vernier calipers, ring gauges.
③Length inspection of seamless pipes: steel tape measure, manual and automatic length measurement.
④ Inspection of seamless pipe and steel pipe curvature: straightedge, level (1m), feeler gauge, thin wire to measure the curvature per meter and the curvature of the full length.
⑤ Inspection of the bevel angle and blunt edge of the end face of the seamless pipe: square, chuck.
3. Seamless steel pipe surface quality inspection: 100%
①Artificial visual inspection: lighting conditions, standards, experience, signs, steel pipe rotation.
②Non-destructive inspection:
a. Ultrasonic flaw detection UT:
It is more sensitive to the surface and internal crack defects of various materials with uniform materials.
Standard: GB/T 5777-1996 Level: C5
b. Eddy current flaw detection ET: (electromagnetic induction)
Mainly sensitive to point (hole-shaped) defects. Standard: GB/T 7735-2004
Level: B level
c. Magnetic particle MT and magnetic flux leakage detection:
Magnetic flaw detection is suitable for the detection of surface and near surface defects of ferromagnetic materials.
Standard: GB/T 12606-1999 Level: C4
d. Electromagnetic ultrasonic flaw detection:
No coupling medium is required, and it can be used for high-temperature, high-speed, rough surface flaw detection of seamless steel pipes.
e. Penetration inspection:
Fluorescence, coloring, and detection of surface defects of steel pipes.
4. Seamless steel management performance inspection:
①Tensile test: measure stress and deformation, determine the strength (YS, TS) and plasticity index (A, Z) of the material
Longitudinal and transverse samples Pipe section, arc, round sample (¢10, ¢12.5)
Small-diameter thin-walled steel pipe, large-diameter thick-walled steel pipe, calibration distance.
Remarks: The elongation rate of the sample after breaking is related to the size of the sample GB/T 1760
②Impact test: CVN, notched C type, V type, work J value J/cm2
Standard sample 10×10×55 (mm) Non-standard sample 5×10×55 (mm)
③Hardness test: Brinell hardness HB, Rockwell hardness HRC, Vickers hardness HV, etc.
④Hydraulic test: test pressure, voltage stabilization time, p=2Sδ/D
5. Process performance inspection process of seamless steel pipe:
① Flattening test: round sample C-shaped sample (S/D>0.15) H=(1+2)S/(∝+S/D)
L=40~100mm Deformation coefficient per unit length=0.07~0.08
② Ring pull test: L=15mm, no cracks are qualified
③Flaring and crimping test: the top center taper is 30°, 40°, 60°
④Bending test: can replace flattening test (for large diameter pipe)
6. Metallographic analysis of seamless steel pipe:
① High power inspection (microscopic analysis): Non-metallic inclusions 100x GB/T 10561 Grain size: grade, difference
Organization: M, B, S, T, P, F, A-S
Decarburization layer: inside and outside.
A method rating: Class A-Sulfide Class B-Oxide Class C-Silicate D-Spherical Oxidation DS Class.
② Low magnification test (macro analysis): the naked eye, magnifying glass is less than 10x.
a. Acid etching inspection method.
b. Sulfur seal inspection method (tube embryo inspection, showing low-cultured tissue and defects, such as looseness, segregation, subcutaneous bubbles, peeling, white spots, inclusions, etc.
c. Tower-shaped hairline inspection method: inspect the number, length and distribution of hairline.


