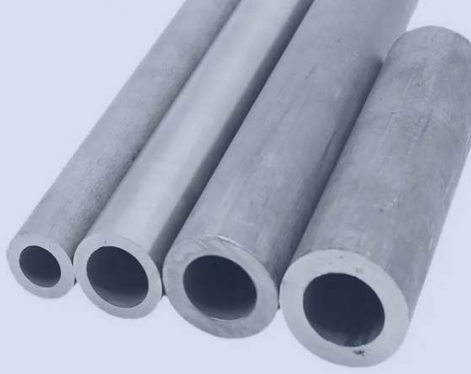
ERW steel pipe is a straight seam resistance welded pipe, English Electric Resistance Welding, abbreviated as ERW. It is used to transport vapor and liquid objects such as oil and natural gas. It can meet various requirements of high and low pressure and plays a decisive role in the field of transportation pipes in the world.
The biggest difference between ERW steel pipes and seamless steel pipes is that ERW has a weld seam, which is also the key to the quality of ERW steel pipes.
Details of the ERW Pipeline Assessment Process:
1. Non-destructive testing
Rotate the detection arm of the inspection station into the straight seam welded pipe production line, observe the position of the weld through the camera, adjust the front and rear position of the probe with the operating rod, overlap the weld with the laser, and save the parameters. Input the steel strip coil number through DATASERVR and DACQ computers, and observe the waveform display on the flaw detection interface. When the waveform exceeds the alarm line, compare the thickness measurement information to determine whether it is a defect wave signal or an interference wave signal, and visually inspect the pipe to see whether the waveform exceeds the alarm line. When the alarm line is exceeded, an alarm will sound. Stop the machine in time and readjust the welding parameters.
The application of surface non-destructive testing is carried out in accordance with the requirements of the standard. Detection objects and applications are usually as follows:
(1) Quality inspection of the outer surface of pipe materials.
(2) Detection of surface defects of important butt welds.
(3) Detection of surface defects of important fillet welds.
(4) Detection of surface defects of important socket welds and tee branch bridge welds.
(5) Detection of surface defects after bending.
(6) Bevel angle detection of welded joints with large material quenching tendency.
(7) The inspection design temperature of non-austenitic stainless steel pipes is lower than or equal to minus 29 degrees Celsius.
(8) Rooting inspection is specified for double-sided welds after rooting.
(9) When an oxyacetylene flame is used to cut welding fixtures on Taijin tubes that have a tendency to harden, defects in repair parts will be detected.
2. Destructive testing
(1) Flatten test. Cut about 100mm of welded pipe and place it under the hydraulic press. The position of the weld seam is perpendicular to the direction of the hydraulic press. Start applying oil pressure and slowly press the welded pipe.Press it down to 3/4 of the diameter and check the weld for cracks. If there are no cracks, weld the seam; if there are cracks, adjust the welding process parameters in time.
(2) Expansion test. Cut off about 100mm of welded pipe and place it on the conical top core; place the conical top core under the hydraulic press, start the oil pressure, and slowly push the welded pipe toward press down, and when the expansion is 8%, check whether the weld is broken and stop the machine in time and readjust the welding parameters.
The biggest difference between ERW steel pipes and seamless steel pipes is that ERW has a weld seam, which is also the key to the quality of ERW steel pipes.
Details of the ERW Pipeline Assessment Process:
1. Non-destructive testing
Rotate the detection arm of the inspection station into the straight seam welded pipe production line, observe the position of the weld through the camera, adjust the front and rear position of the probe with the operating rod, overlap the weld with the laser, and save the parameters. Input the steel strip coil number through DATASERVR and DACQ computers, and observe the waveform display on the flaw detection interface. When the waveform exceeds the alarm line, compare the thickness measurement information to determine whether it is a defect wave signal or an interference wave signal, and visually inspect the pipe to see whether the waveform exceeds the alarm line. When the alarm line is exceeded, an alarm will sound. Stop the machine in time and readjust the welding parameters.

The application of surface non-destructive testing is carried out in accordance with the requirements of the standard. Detection objects and applications are usually as follows:
(1) Quality inspection of the outer surface of pipe materials.
(2) Detection of surface defects of important butt welds.
(3) Detection of surface defects of important fillet welds.
(4) Detection of surface defects of important socket welds and tee branch bridge welds.
(5) Detection of surface defects after bending.
(6) Bevel angle detection of welded joints with large material quenching tendency.
(7) The inspection design temperature of non-austenitic stainless steel pipes is lower than or equal to minus 29 degrees Celsius.
(8) Rooting inspection is specified for double-sided welds after rooting.
(9) When an oxyacetylene flame is used to cut welding fixtures on Taijin tubes that have a tendency to harden, defects in repair parts will be detected.
2. Destructive testing
(1) Flatten test. Cut about 100mm of welded pipe and place it under the hydraulic press. The position of the weld seam is perpendicular to the direction of the hydraulic press. Start applying oil pressure and slowly press the welded pipe.Press it down to 3/4 of the diameter and check the weld for cracks. If there are no cracks, weld the seam; if there are cracks, adjust the welding process parameters in time.
(2) Expansion test. Cut off about 100mm of welded pipe and place it on the conical top core; place the conical top core under the hydraulic press, start the oil pressure, and slowly push the welded pipe toward press down, and when the expansion is 8%, check whether the weld is broken and stop the machine in time and readjust the welding parameters.


